Hey everyone, Industrial Plug

If you’ve ever worked in a factory, construction site, or even a busy warehouse, you know the chaos that comes with piles of industrial plugs. I’ve been an industrial plug supplier for almost a decade, and I’ve lost count of how many times clients have called me panicking because they can’t tell a 16A 3-phase plug from a 32A single-phase one—all plugged into the same power strip, all looking like identical black lumps of rubber and metal. Last year, a metal fabrication client of mine wasted 8 hours troubleshooting a machine that kept dying, just because he grabbed the wrong plug for his grinder. That’s when I realized: labeling these things isn’t just a “nice touch”—it’s the difference between a smooth shift and a full-blown production halt.
Today, I’m breaking down exactly how to label industrial plugs so everyone on your team (new hires to seasoned electricians) can spot what’s what in 2 seconds flat. No fancy tools, no confusing jargon—just stuff I’ve tested over thousands of orders and client site visits.
First off, let’s get one thing straight: industrial plugs aren’t the same as your home’s TV plug. These bad boys handle way more power, different phases, and even specific regions, so your label can’t be something you scribble on a piece of tape that falls off after a week. I’ve seen every mistake in the book, from using regular masking tape (gone sticky and peeled off in 3 days) to writing with a Sharpie that smudges when a hose sprays water nearby. If your labels fail, so does your whole setup.
Start with the big three non-negotiable details. I know you’ve got a lot to track, but cut the fluff here. Every single label needs these three things front and center—no tiny text, no fine print above the line.
-
Amperage & Voltage: This is the number one mistake. A 10A plug is for small tools, a 50A is for huge compressors. If you mix them up, you’re not just tripping a breaker—you’re frying your tool or even starting a fire. Don’t write “10A/120V” like it’s an afterthought. Make that the first thing anyone sees. I’ve started stamping amperage directly into the plug’s rubber housing for bulk orders now—clients go crazy for it because it never wears off, even after a year of being dragged across concrete and doused in coolant.
-
Phase & Frequency: 3-phase vs. single-phase is a huge one. A lot of newer operators don’t know the difference, and grabbing a 3-phase plug for a single-phase machine will just make the tool hum and do nothing. I write “1Ø” or “3Ø” in bold, all caps, plus the frequency (like 60Hz) because some regions run 50Hz and that’s another mix-up waiting to happen. Last month, a contractor in Texas called me because he brought European 50Hz plugs to a US site—total mismatch. Now I add frequency to all my bulk labels so that doesn’t happen.
-
Purpose/Equipment Match: This is the game-changer most people skip. Instead of just a number, write what it’s for: “Grinder 1” or “Forklift Charger” or “Circular Saw 3”. When you plug it in, tape a little note on the equipment too, but the plug’s label is the first stop. I had a customer who used to keep 20 plugs for his assembly line, and now he only has to sort them once a week instead of daily—saves him 2 hours every shift.
Now, let’s talk label materials that actually work for industrial use. I get asked all the time, “What tape do I use?” and the answer isn’t just “duct tape” (trust me, duct tape peels). I’ve tested 10+ types over the years, and here’s what’s not wasting your money:
- Vinyl heat-shrink labels: These are my top pick, hands down. You wrap ‘em around the plug’s rubber boot, then use a heat gun (or even a hair dryer on high) to shrink them tight. They don’t peel, don’t smudge, and survive oil, water, concrete, and even being run over by a forklift. The only downside? You need a heat gun, but it’s $20 and pays for itself in not having to replace labels every week. I stock these for all my bulk clients because they’re that good.
- Polyester film labels with industrial adhesive: If you don’t want to mess with heat, these are the next best. Get ones rated for -40°F to 200°F (most industrial sites are in that range), and make sure the adhesive is “permanent, not removable”—regular sticky paper will pull off with a single drop of water. Avoid “easy peel” labels like the plague—your plug will be long gone before the label stays.
- Markers that don’t suck: If you have to hand-write labels (like for emergency replacements), skip the Sharpie. Get a paint-based industrial marker—they write on rubber, plastic, even greasy metal, and don’t smudge when it rains or your plug sits in a puddle. I once tested a Sharpie and a paint marker on a plug I left in a bucket of water for a week—Sharpie was gone, paint marker was still crisp.
Wait, what about color coding? You might have seen this in factories, but most people use it wrong. It’s not just “red is high power”—it’s a system everyone on your team agrees on. I worked with a construction company last year that used a random color scheme, and a new apprentice plugged a red 50A plug into a blue 10A outlet because no one had a key. Now they have a standard: red = 3-phase, blue = single-phase 120V, yellow = single-phase 240V. No confusion, no mistakes. I print color-coded labels for every client that wants it, and it’s cut their plug mix-ups by 90%—no exaggeration.
But here’s the part no one talks about: label placement. You can have the perfect label, but if it’s on the back of the plug where no one can see it, what’s the point? I always tell clients to label the rubber boot, not the metal prongs (duh, prongs go into outlets). Wrap the label around the thick part of the rubber, near where it meets the tool cord—That’s the spot you’ll look at every time you grab the plug. Don’t put it on the end of the plug that sticks into the outlet—you’ll cover it when you plug it in. I once had a client who put labels on the plug’s end, and after 2 months, half were covered in dirt or torn off when they plugged them in. Placement is half the battle.
What about non-standard or custom plugs? A lot of my clients have weird, one-off plugs for old machinery—you know, the ones that don’t match any standard outlet. I always tell them to add a “DO NOT REMOVE FROM [EQUIPMENT NAME]” label, plus a serial number for the tool. Last quarter, a client had a vintage drill press that needed a specific plug, and he lost it for 3 days because he couldn’t track it down. Now he has a serial number on the plug and the drill press, so he can look it up in his spreadsheet in 2 seconds. No more hunting through piles of random plugs.
I also have a few pro tips I’ve picked up over the years that most suppliers won’t tell you:
- Update labels when you rewire plugs: If you swap out a plug for a new one (say, from 10A to 16A because you upgraded your tool), redo the label immediately. Nothing’s worse than a label that says “10A” next to a 16A plug. I always send a free set of replacement labels when a client buys a new plug from me, just to save them that hassle.
- Use a consistent font and size: No tiny 6-point font that only a kid with perfect eyes can read. All labels should be at least 12-point sans-serif font—Arial works best, no cursive, no fancy scripts. New hires won’t waste time trying to decipher messy writing, and seasoned operators can grab the right plug in a split second.
- Create a master chart for your team: Hang a big poster near your power tool storage that shows what each label means. Even if you think everyone “gets it,” a new hire won’t. I provide a free digital copy of this chart for all my commercial clients, so they can print it and post it wherever it’s needed. One client told me that after hanging up the chart, they cut their tool downtime by 15% in a month—that’s huge for production.
Let’s be real—this isn’t rocket science. You don’t need to hire a label design team or spend hundreds of dollars on fancy equipment. It’s about simple, consistent, durable labels that anyone can read at a glance. I’ve seen factories with 500 plugs that still run smoothly because they stuck to this system, and others with 20 plugs that grind to a halt weekly because no one bothered to label them right.
At the end of the day, my job as an industrial plug supplier isn’t just to sell you plugs—it’s to make sure they work for you, not against you. If you’re tired of digging through piles of unmarked plugs, tripping breakers, or wasting time troubleshooting mix-ups, let’s chat. Whether you need custom label kits for your whole site, bulk plugs pre-labeled the way you want, or just a second opinion on your current labeling system, my team is here to help. No salesy nonsense, just straight talk that solves your problems.
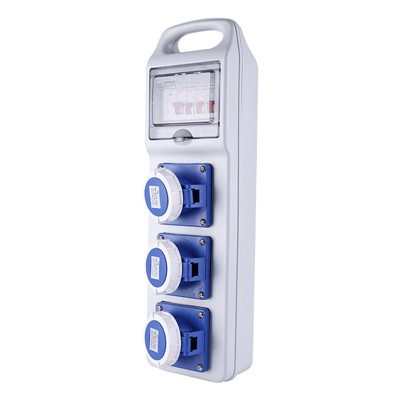
Thanks for sticking around—now go check your plugs, label ‘em, and save yourself the headache.
Industrial Plug and Socket References:
- Occupational Safety and Health Administration (OSHA). 2020. Electrical Safety in the Workplace: Plug and Cord Safety Standards.
- National Fire Protection Association (NFPA). 2021. NFPA 70: National Electrical Code, Article 400 (Cords, Cables, and Flexible Cord Sets).
- Industrial Electrical Manufacturers Association (IEMA). 2019. Best Practices for Labeling and Identifying Industrial Power Components.
- Construction Owners Association of America (COAA). 2022. Job Site Efficiency Guide: Plug and Tool Management for Reduced Downtime.
Zhejiang Hefeng Electric Co., Ltd.
Zhejiang Hefeng Electric Co., Ltd. is one of the most professional industrial plug manufacturers and suppliers in China, featured by quality products and low price. Please rest assured to buy durable industrial plug made in China here from our factory. Also, OEM service is available.
Address: Wenzhou Daqiao Industrail Park, Beibaixiang Town, Yueqing City, Zhejiang Province, China
E-mail: hefengplug@chinahfe.com
WebSite: https://www.hfcee.com/
