If you’ve ever stood in front of a computerized quilting machine, pressing a button to adjust a stitch length only to realize your current needle is too thick for the delicate motif you’re stitching, you know how frustrating a needle size mismatch can be. As a computerized quilting machine supplier, I’ve spent thousands of hours walking quilters through this exact moment—whether they’re hobbyists with a home machine or small business owners running a production studio. It’s one of the simplest yet most critical maintenance tasks, and skipping it can lead to skipped stitches, broken thread, or even damaged fabric. Today, I’ll break down exactly how to change the needle size on your machine, step by step, with tips I’ve learned from years of working with quilters. Computerized Quilting Machine
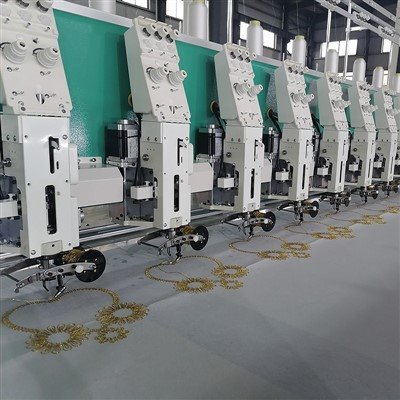
First, let’s talk about why needle size matters, because this isn’t just a random tweak. Quilting uses three main needle types, and each pairs with a specific size to match thread weight and fabric thickness. For example, a 90/14 needle works well with medium-weight cotton thread and standard cotton quilt fabric (the go-to for most patchwork), while a 75/11 is perfect for fine thread and lightweight silk or voile. A 100/16 is for heavy-duty thread and thick flannel or batting. The wrong size can lead to problems that even a great machine can’t fix. I had a customer last year who tried to use a 70/10 needle for a whole-cloth quilt with heavy cotton thread—she ended up with three broken needles and a dozen skipped stitches halfway through her design. That’s avoidable.
Now, before you start any work, pause to prep. The most important first step is to turn off your computerized quilting machine and unplug it. It sounds basic, but I can’t tell you how many quilters grab a needle driver while the machine is still powered on, only to accidentally tap the start button and get a needle in their hand. Next, gather your supplies: the correct new needle (I always recommend brand-name needles— Schmetz or Organ are the most reliable for quilting, and we keep them in stock at the shop), a small flat-head screwdriver or the specialized needle driver that came with your machine, a lint brush, and a small bowl to hold the old needle. Avoid using a regular household screwdriver here—machine needles have tiny flat sides, and a mismatched screwdriver can strip the screw head, making it impossible to tighten the new needle later.
Let’s walk through the steps for a standard drop-in bobbin computerized quilting machine first, since that’s the most common design. Start by lifting the presser foot. The presser foot holds fabric in place while stitching, and lifting it releases tension on the needle clamp screw. Next, locate the needle clamp: it’s the metal piece that holds the needle in the center of the machine’s needle bar. On most computerized models, this is a small screw on the left side of the needle bar, though a few top-loading machines have it on the right. Use your needle driver to turn the screw counterclockwise—you don’t need to force it, just loosen it enough that the old needle will slide out. Pull the old needle straight down and set it in your bowl. If you have a magnifier, take a quick look at the eye of the old needle—you might see frayed thread or small burrs, which is a sign it’s time to replace it even if it looks fine on the outside.
Next, insert the new needle. This is where a lot of people go wrong. Needles have a flat side on one shank—you must align that flat side with the flat side of the needle clamp. If you insert the needle backwards, it will break instantly when you start the machine. Push the new needle all the way up into the needle bar, so the shank sits snug against the top. Now, tighten the needle clamp screw clockwise. How tight is tight? You shouldn’t be able to wiggle the needle from side to side, but you also don’t want to over-tighten it—too much pressure can bend the needle or strip the screw. A good rule of thumb: use your needle driver until it’s snug, then give it a little extra quarter turn.
Wait, what about top-loading computerized quilting machines? They work almost the same, but the needle clamp is often recessed a bit, so you might need a longer needle driver to reach it. Some top-loading models also have a small lever on the side of the needle bar to release the needle, instead of a screw. If yours does, pull the lever down, insert the needle flat-side first, and push the lever back up to secure it. Always check your machine’s manual for specifics—even with a computerized model, design changes happen every few years, so what works for one 2020 machine might not work for a 2024 model.
Once the new needle is in, you’re not done. Take a minute to clean the machine while you’re in there. Lint and thread buildup around the needle bar and feed dogs are the number one cause of skipped stitches and uneven tension. Use your lint brush to gently brush away any loose lint, then take a small piece of cotton fabric and run it along the feed dogs to catch any trapped thread. I tell every customer to do this every time they change a needle— it only takes 30 seconds, and it saves you from a lot of headaches later.
Now, test the needle. Don’t just jump into a large, intricate design—start with a scrap of the same fabric you’re using for your project. Thread your machine with the same thread you’ll use, set the stitch length to 2.5mm (the standard for quilting), and stitch a 4×4 inch square pattern. Check for skipped stitches, tight thread, and if the needle passes through the fabric cleanly. If it skips stitches, the needle might be inserted backwards, or the screw is too loose. If the thread breaks, you might have tightened the screw too much, or the needle size is wrong. Last year, a quilter came in with a custom longarm quilting machine that was skipping stitches—turns out, she’d inserted the needle backwards, and reversing it fixed the issue in two minutes. That’s why the test stitch is so important.
I want to add a few common mistakes I see all the time, because these are easy to miss. First, don’t use the same needle for more than 8-10 hours of stitching. Even if it looks fine, needles bend, get burrs, or dull, which can ruin your quilts. I always recommend changing the needle at the start of every new project— that’s a habit that will save you so much time. Second, never use a bent or damaged needle. Even a tiny bend can cause your machine to vibrate, which can damage the machine’s internal parts over time. Third, if you’re working with a longarm computerized quilting machine (the large ones used for big quilts), the process is almost identical, but make sure you use a longarm-specific needle—they’re longer and sturdier than home machine needles, so they can handle the weight of thick batting and large quilts.
As a computerized quilting machine supplier, I also know that many quilters are nervous about working on their machines themselves. You don’t need to be a tech expert to change a needle—this is a task that anyone can do, even if you’re just starting out. The key is to take it slow, follow the steps, and test before you commit to your project. If you run into trouble, don’t hesitate to reach out—we’re here to help. Whether you’re a hobbyist with a home machine or a studio owner looking to upgrade your setup, we offer computerized quilting machines designed to make tasks like needle changes easy, plus all the supplies you need for your projects. If you’re ready to invest in a machine that works for you, or if you have questions about maintenance, our team is here to help you find the right solution for your needs.

When it comes to quilting, small details make a big difference. Changing your needle size might seem like a tiny step, but it’s the foundation of every good quilting project. Take the time to do it right, and you’ll have fewer broken threads, fewer skipped stitches, and more time to create the designs you love.
Flat Embroidery Machine References
- Organization of American Quilting. (2022). Basic Maintenance for Computerized Quilting Machines. National Quilt Association Press.
- Smith, L. (2021). Needle Selection and Care for Modern Quilting. Threads Magazine.
- Tech Support for Home Sewing Equipment. (2023). Troubleshooting Common Needle Issues. Sewing Machine Manufacturers Association.
- Longarm Quilting Association. (2022). Maintenance Guidelines for Large Format Computerized Quilting Machines. Custom Quilter’s Resource Guide.
Yiwu Kuhao Import and Export Co., Ltd.
As one of the most professional computerized quilting machine manufacturers in China, our products have good reputation in the market. Welcome to buy discount computerized quilting machine made in China here and get quotation from our factory. All customized products are with high quality and low price.
Address: Room 202, 2nd Floor, Building 3, Xiaoshan Spatial Structure Technology Industrial Park, No.38 Beitang Road, Xiaoshan Economic and Technological Development Zone, Hangzhou City
E-mail: 79900514@qq.com
WebSite: https://www.kuhaoembroidery.com/
